Ticketing
Managing
Creating a ticket
Use Add ticket on the ticket overview page to create a new ticket:
| Field | Required | Description |
|---|---|---|
| Workspace | — | The ticket is created in your default workspace; this cannot be changed in the dialog. |
| Type | yes | The kind of ticket. The available types (with their icon and color) are configured per environment. Selecting a type applies that type's configured default severity and description, and shows the Description field below if the type has description enabled. |
| Severity | yes | The severity of the ticket on the standard Versio.io 10-step severity scale. Defaults to the selected type's configured value. |
| Title | yes | A short summary of the ticket (display name). |
| Description | no | Only shown for ticket types with description enabled. Supports Markdown formatting. |
After creation, you are taken directly to the new ticket's details, where fields such as tags, tasks, participants, reporter information, documents, and affected instances can be filled in.
Deleting a ticket
Use the Delete button in the ticket header to delete a ticket. After confirming the dialog, the ticket and all of its data — comments, tasks, work times, and documents — are permanently deleted.
Whether the ticket's attached documents are also removed from the document storage is controlled by the Delete referenced documents option in the environment's document storage settings:
- Enabled — the documents are deleted from the document storage together with the ticket.
- Disabled — the documents remain in the document storage (e.g. for compliance or backup reasons), but are no longer accessible through Versio.io once the ticket is gone.
Note: This option only applies when the ticket itself is deleted. Deleting a single document from the documents tile always removes it from the document storage.
Dublicate a ticket
Comming soon
Merge or split a ticket
Comming soon
Ticket report
Comming soon
Core section
Status and ticket fields
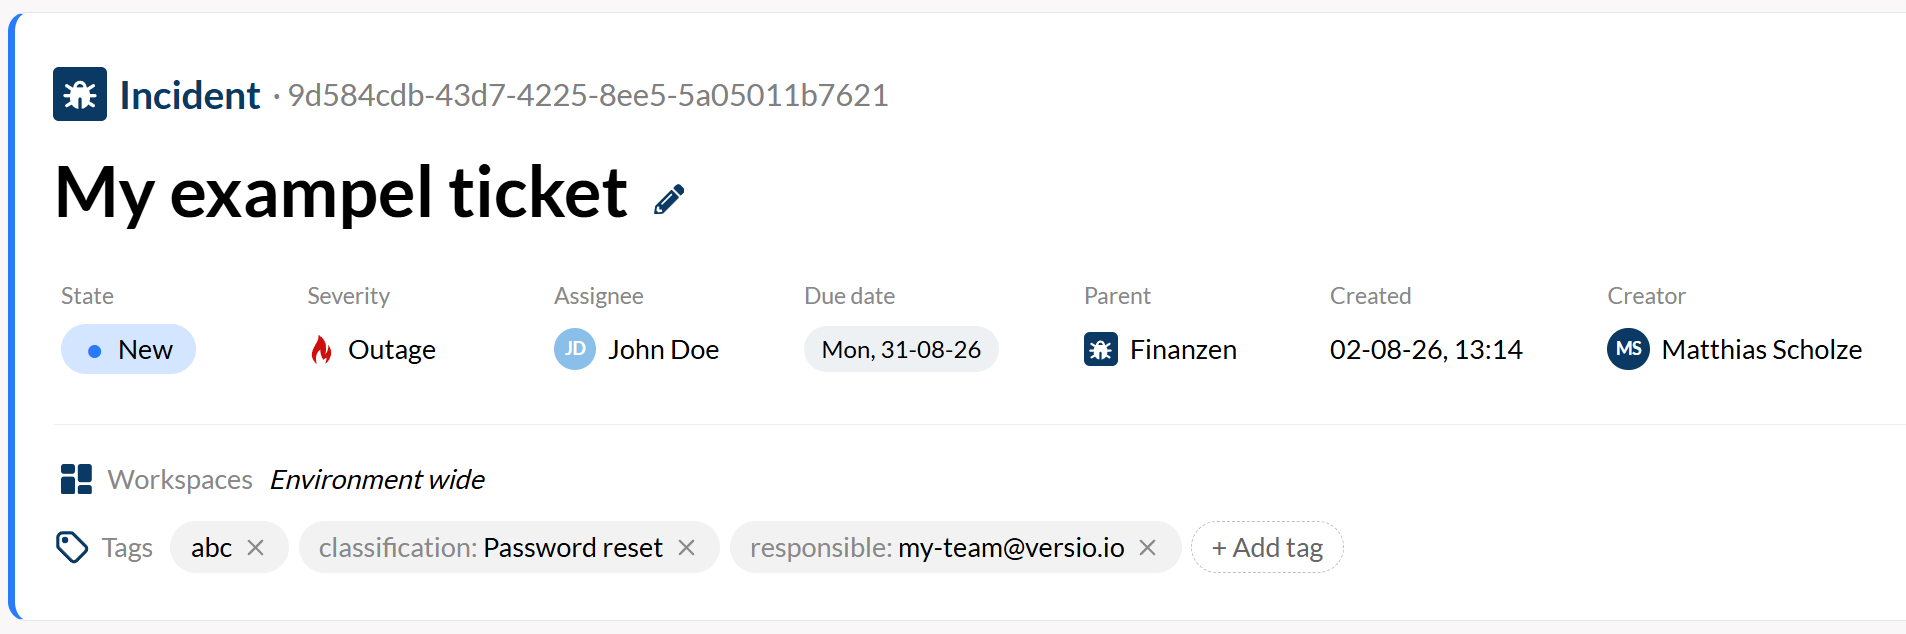
Figure: Ticket core section
Status
TODO Ticket status is coming from the ticket type configuration
The ticket status is shown as a colored chip below the ticket title. Click it to change the status:
| Status | Meaning |
|---|---|
| Open | The ticket has not been worked on yet. |
| In progress | The ticket is actively being worked on. |
| Resolved | The work is done. |
| Closed | The ticket is finished and closed. |
The status can also be cleared — the ticket then shows No status.
Changes are recorded in the activity feed.
Fields
The fields bar below the title shows the core ticket fields. Click a value to change it (except the type); changes are saved immediately:
TODO Ticket type can not be changed and has user defined values
| Field | Description |
|---|---|
| Type | The kind of ticket, set on creation (see Creating a ticket). |
| Severity | The severity of the ticket on the standard Versio.io 10-step severity scale. |
| Assignee | The user responsible for the ticket. The dropdown offers the ticket's participants; any other email address can be typed in. The assignment can also be removed. |
| Due date | The date the ticket should be done. A ticket is marked Overdue once the due date has passed — the due day itself does not count as overdue, and tickets in the Resolved or Closed status are never flagged. |
Changes are recorded in the activity feed.
Title and description
Use the edit icon next to the ticket title or in the description tile to change them. The description supports Markdown formatting. Both changes are recorded in the activity feed.
Workspaces
The workspaces a ticket belongs to are shown in the ticket details. Tickets in the global workspace are marked with the global workspace icon.
Click the workspace names to change the ticket's workspaces: select one or more workspaces in the dropdown and save. Workspace changes are recorded in the activity feed.
Tags
Tickets can be labeled with tags to categorize and find them. A tag consists of a key and an optional value, e.g. Team: Team1 or just frontend.
- Add a tag with the tag icon in the tags section, entering a key and optionally a value.
- Remove a tag by clicking its delete icon.
Every tag change is recorded in the ticket's activity feed.
Main Section
Task list
The task list breaks a ticket down into checkable steps. A progress bar and a done counter at the top show how far along the ticket is.
- Add a task by typing its text into the Add a task... field and clicking Add.
- Complete or reopen a task with its checkbox.
- Edit a task with its edit icon to change the text, the assignee, or the due date.
- Assign a task by choosing one of the ticket's participants — or click the + avatar placeholder on the task row as a shortcut.
- Due dates are shown on open tasks; once the due date has passed, the task is marked Overdue (the due day itself does not count as overdue).
- Delete a task with its delete icon. Deleting a task also deletes its subtasks.
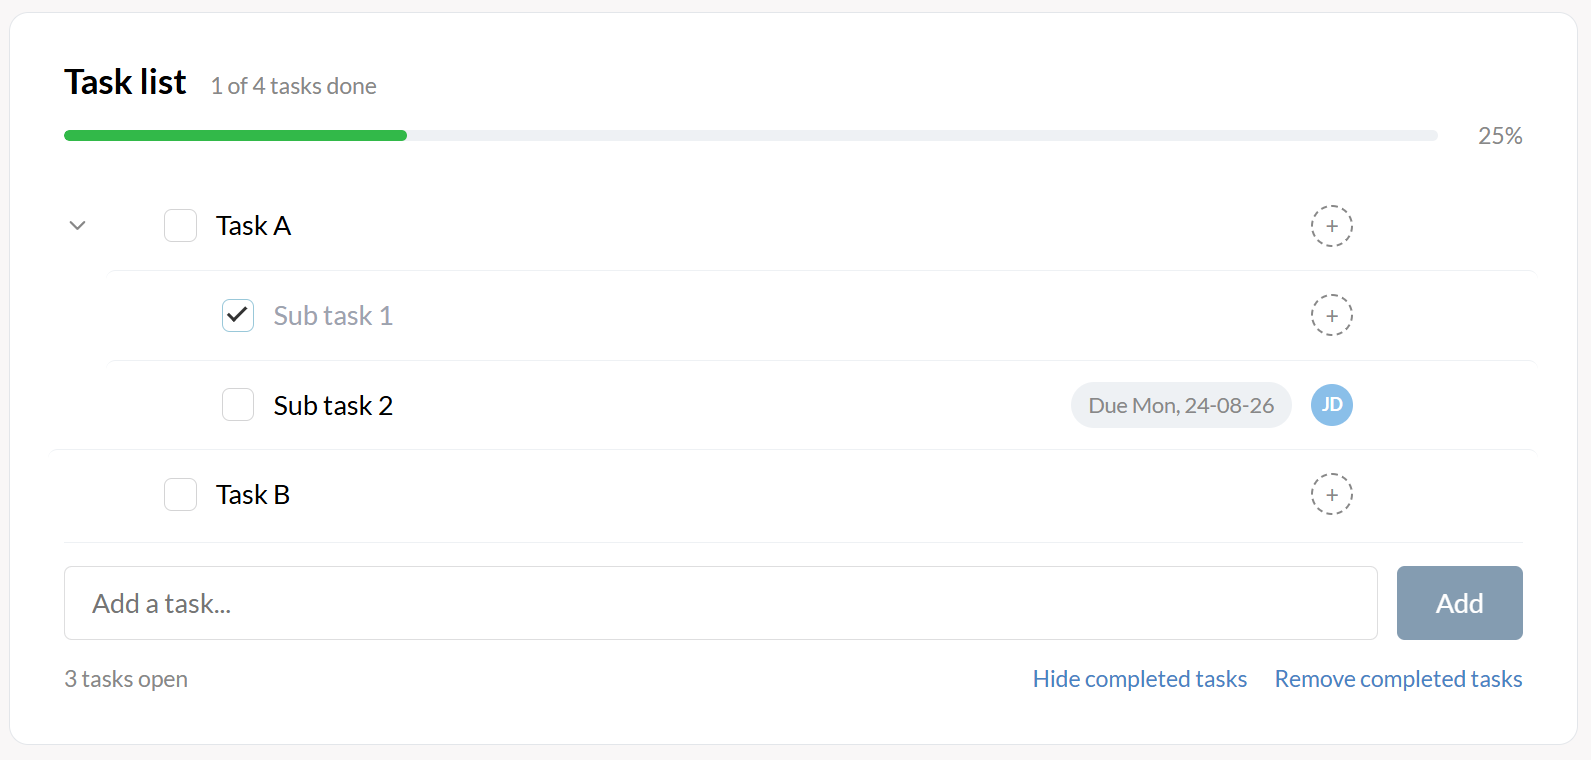
Figure: Ticket task list
Subtasks and ordering
Use the drag handle on the left of a task row to reorder tasks. Dragging a task onto another task nests it as a subtask — one nesting level is supported, so only tasks that have no subtasks themselves can become subtasks. Dragging a subtask out of its list makes it a top-level task again.
Footer actions
The footer shows how many tasks are still open and offers:
- Hide completed / Show completed — toggle the visibility of finished tasks. While completed tasks are hidden, drag & drop is disabled.
- Remove completed tasks — delete all finished tasks at once. A completed task keeps its open subtasks: it is only removed once all of its subtasks are done as well.
Every task change is recorded in the activity feed.
Activity
The activity feed shows the complete history of a ticket in chronological order — from its creation through every change:
- Comments
- Title changes and description edits
- Status, severity, assignee, and due date changes
- Reporter information changes
- Workspace changes
- Added, changed, completed, or removed tasks
- Uploaded or deleted documents
- Added or removed watchers
- Added or removed affected instances
- Added, changed, or removed tags
- Work estimate changes
- Logged or removed work times
Each entry shows who did what and when. Timestamps are shown as relative times (e.g. 2 hours ago); hover over them to see the exact date and time. The feed loads the 10 most recent entries; use Show older activity to load more.
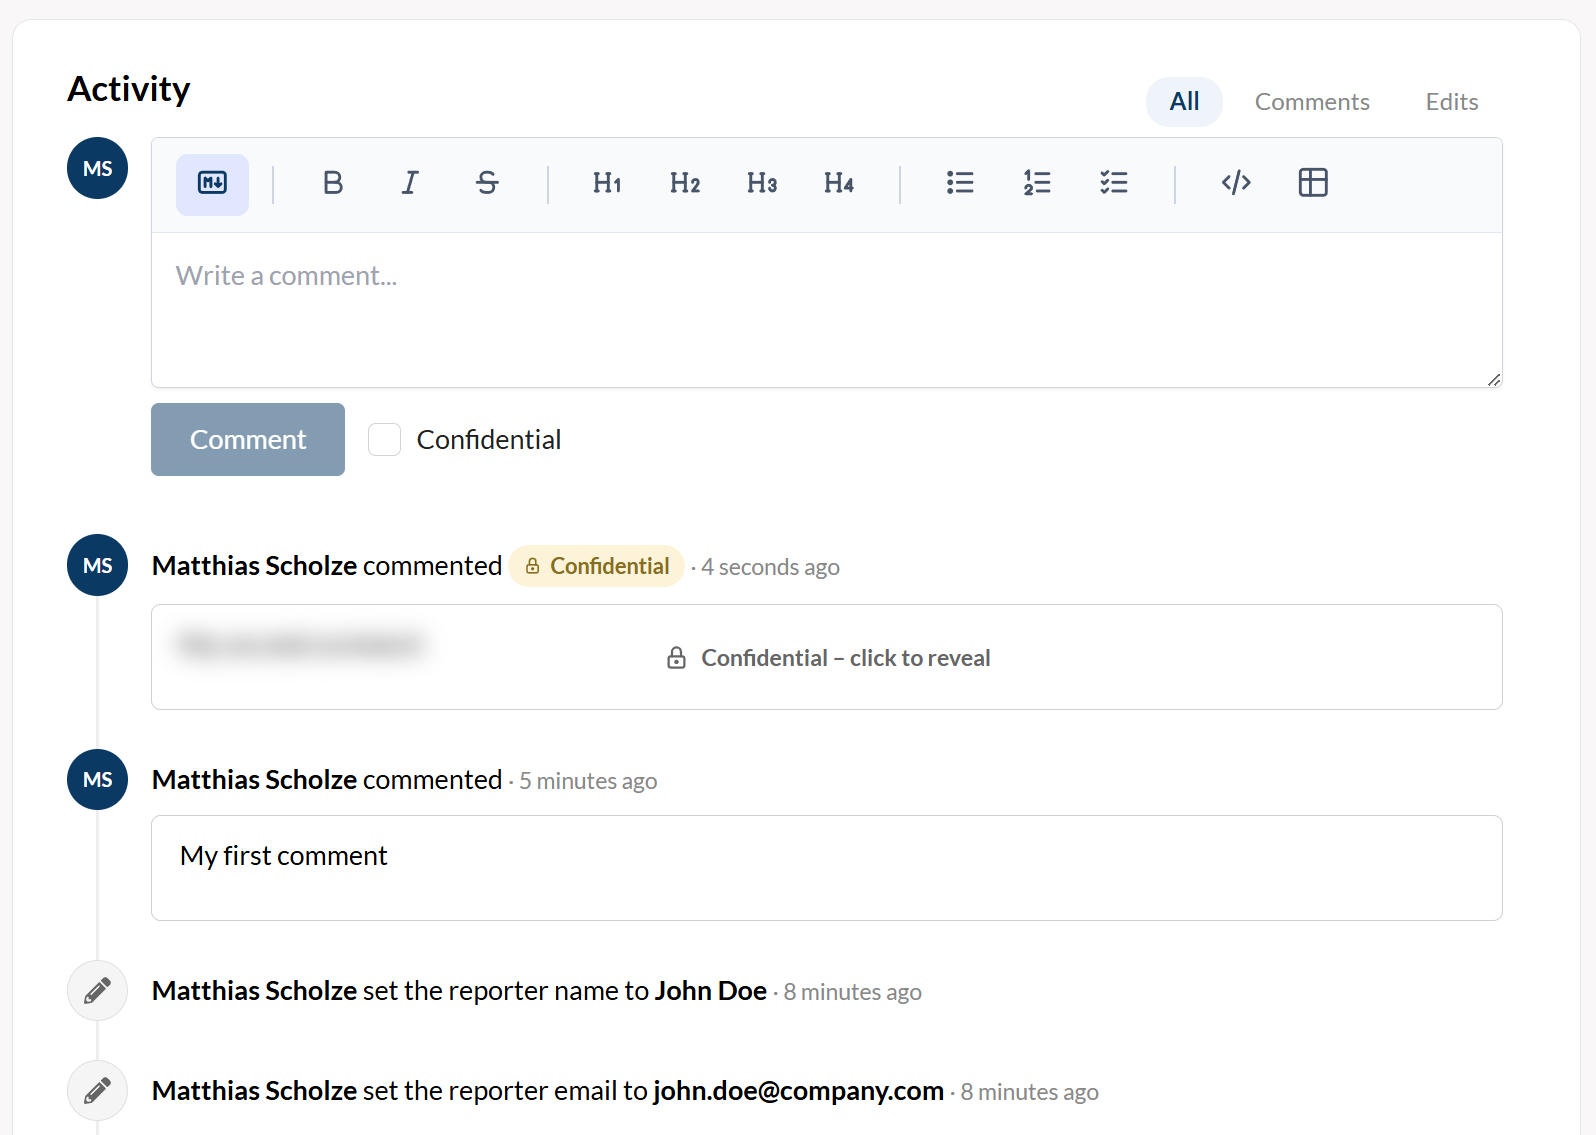
Figure: Ticket acivities and comments
Filtering the feed
Use the filter chips above the feed to narrow it down:
| Filter | Shows |
|---|---|
| All | Every activity |
| Comments | Comments only |
| Edits | Changes only |
Public and confidential commenting
Write a comment in the composer at the top of the activity feed and click Comment. Comments support Markdown formatting.
You can edit and delete your own comments using the icons next to the comment's timestamp:
- Edited comments are marked with an edited label; hover over it to see when the comment was last edited.
- Deleted comments keep their place in the feed, but the text is replaced by a note stating who deleted the comment and when.
Check Confidential before posting to mark a comment as confidential. Confidential comments are:
- Marked with a lock badge in the activity feed.
- Blurred by default — click the comment to reveal it, and click the Confidential badge to blur it again.
Widgets
In the right-hand sidebar, you will find various ticket widgets. These functional and informative modules (Function & Content Widgets) assist you in processing the ticket by providing important context or enabling direct actions such as time recording.
Reporter
The reporter tile holds the contact information of the person who reported the ticket — useful when the reporter is not a Versio.io user (e.g. an end user calling the service desk):
| Field | Description |
|---|---|
| Name | The reporter's name. |
| Shown as a clickable mailto link with a copy button. | |
| Phone | Shown as a clickable tel link with a copy button. |
| Note | A free-text note, e.g. availability or additional context. |
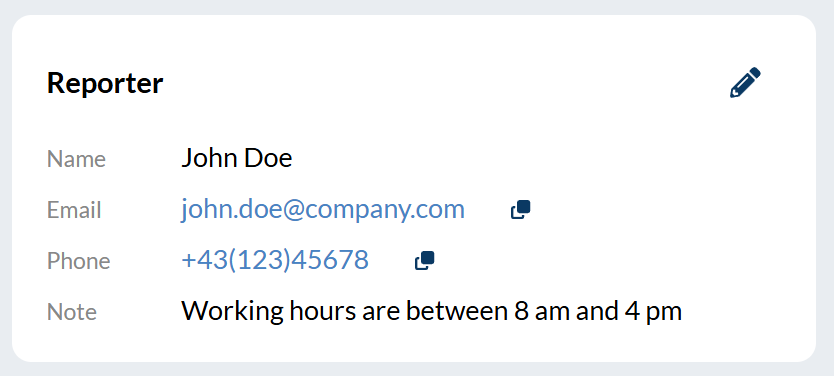
Figure: Ticket reporter
Use the edit icon to change the reporter information. All reporter changes are recorded in the activity feed.
Time tracking
Overview
The planned and actual time spent on ticket processing can be viewed and managed directly on the ticket.
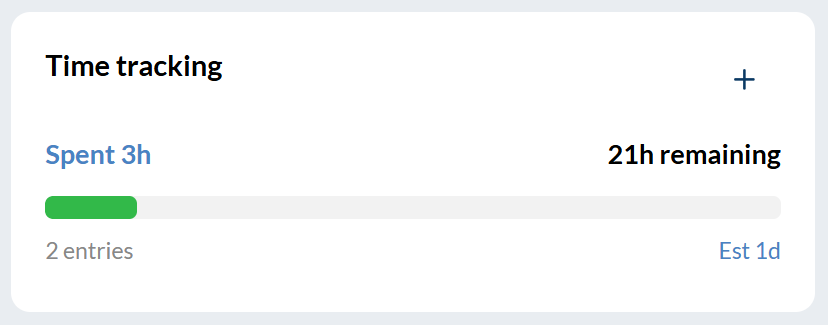
Figure: Time tracking overview
Add time entry
Use the + button in the time tracking section (or the time spent link while no time is logged) to add a time entry:
| Field | Required | Description |
|---|---|---|
| Time spent | yes | The worked time as time text, e.g. 1h 30m (see Entering time values). |
| Spent at | no | The day the work was performed. Defaults to today if left empty. |
| Spent by | no | The user who performed the work. Defaults to you if left empty. |
| Note | no | A short description of what was worked on. |
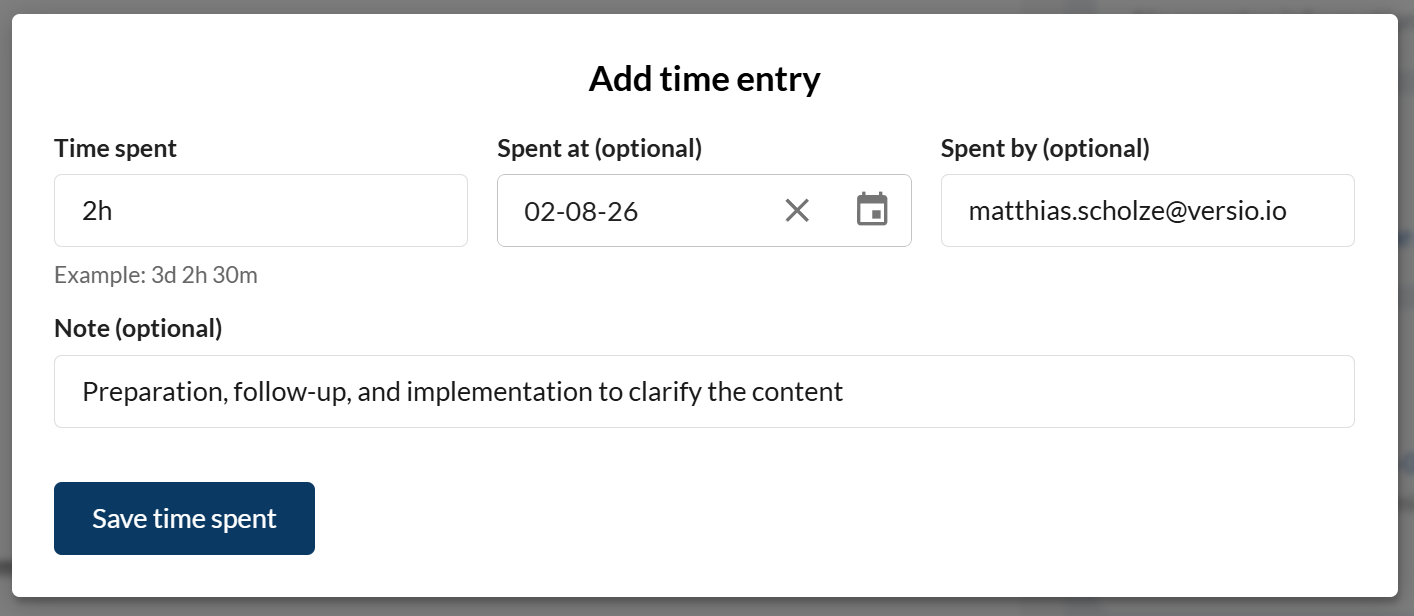
Figure: Add a time tracking
Time entries can be deleted from the entries table in the time tracking report.
Setting an estimate
Click the estimate link (or the Est / No estimate label in the summary) to set the estimated total work for the ticket, entered as time text, e.g. 3d 4h. The summary then shows the remaining time and a progress bar comparing spent time against the estimate. Use Remove estimate in the same dialog to clear an existing estimate.
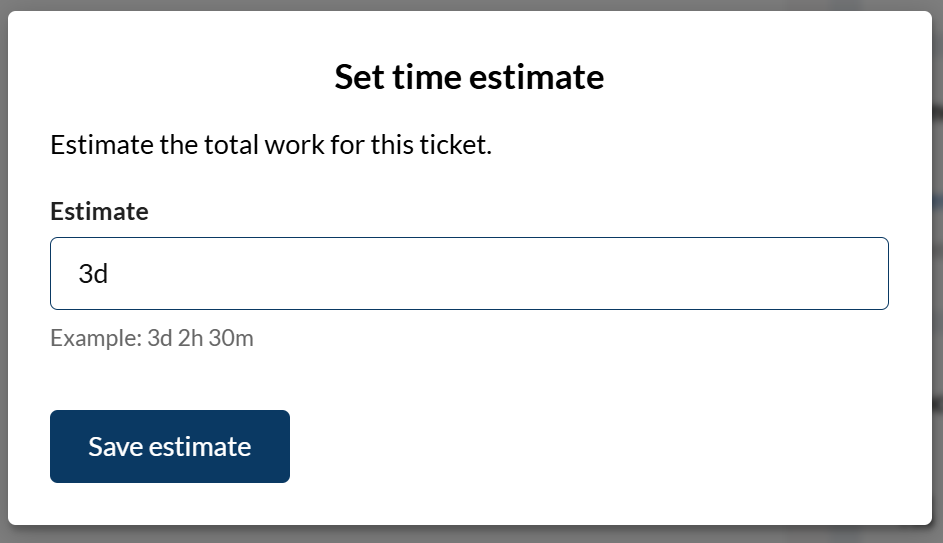
Figure: Estimation of the effort involved in processing the ticket
Time tracking report
Click the Spent … label in the time tracking summary to open the time tracking report. It contains:
- Effort summary — the estimate and total spent time as progress bars, including the spent percentage of the estimate.
- User distribution — the spent time per user, most active first. The four most active users are listed individually; further users are combined into one others row.
- Time tracking entries — a table of all time entries with time, user, date, and note. Entries can be deleted here.
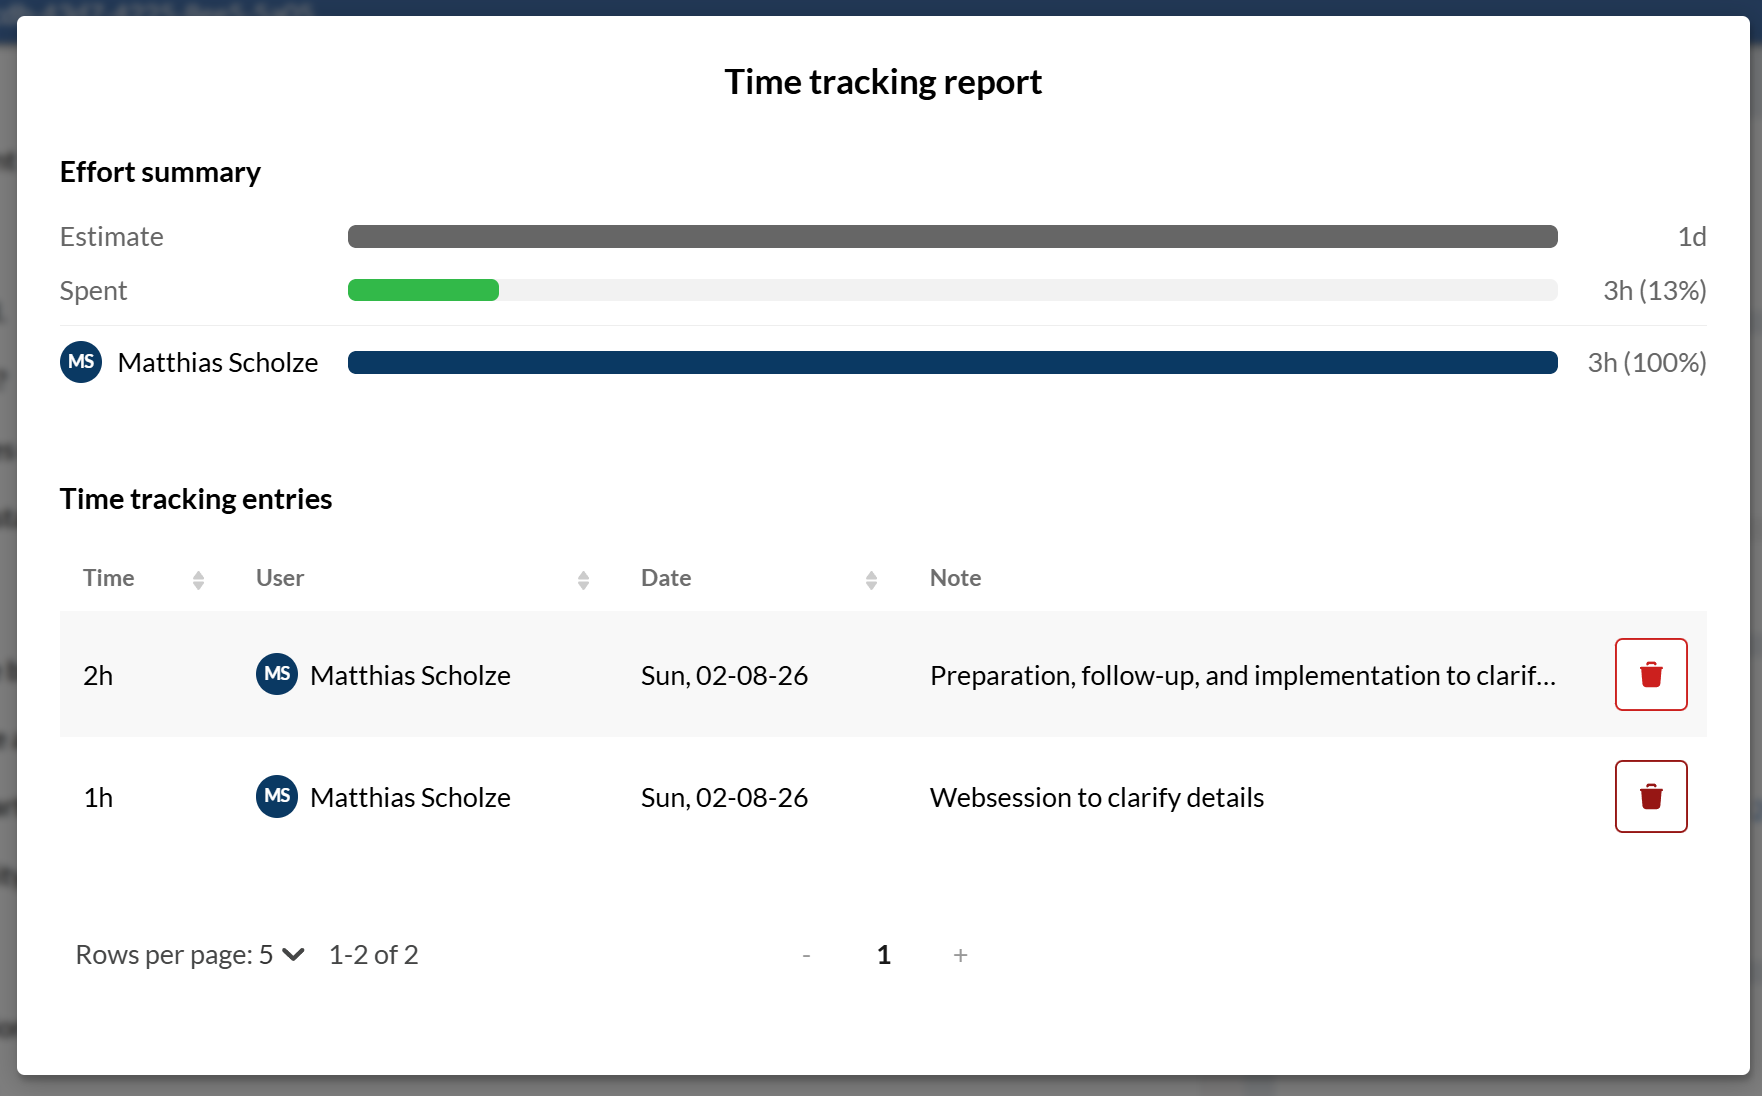
Figure: Time tracking report
Entering time values
Time values (e.g. logged work or estimates) are entered as free text using numbers with a time unit:
| Unit | Meaning | Example |
|---|---|---|
m |
Minutes | 30m |
h |
Hours | 2h |
d |
Days (24 hours) | 1d |
w |
Weeks (7 days) | 2w |
mo |
Months (30 days) | 1mo |
y |
Years (365 days) | 1y |
Rules:
- Combine units to express any duration, e.g.
1h 30mor2d 4h. - Plain numbers are minutes: entering
90is the same as90mor1h 30m. - Decimals are allowed, with dot or comma:
1.5hand1,5hboth mean 1 hour 30 minutes. - Spaces and casing don't matter:
1h30m,1H 30Mand1h 30mare all valid. - Maximum value for time spent and estimates is 10 years.
If the entered text cannot be interpreted, the field is highlighted and an error message is shown below it. The value is not saved until the format is corrected.
Documents
Files can be attached to a ticket in the documents tile:
- Upload a document with the add icon and select a file.
- Capture a screenshot with the monitor icon and select a browser tab, a windows or a monitor screen.
- Preview a document by clicking the document name. The preview works for images and PDF files.
- Download a document by clicking its name or the download icon.
- Delete a document with its delete icon.
Each document is listed with a file-type icon, its size, type, and when it was last modified. Uploads and deletions are recorded in the activity feed.
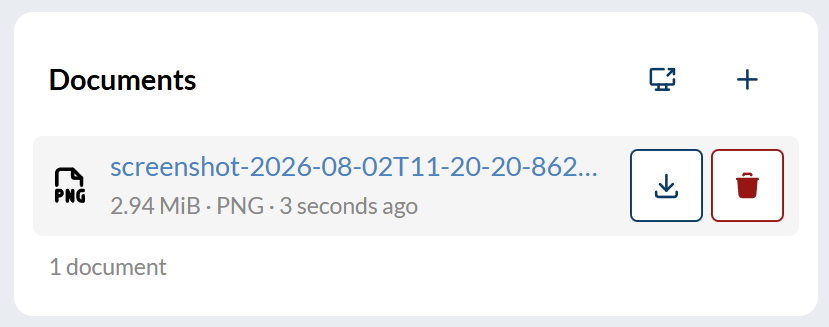
Figure: Ticket documents (files)
Note: Documents require a configured document storage for the environment. If none is configured, the tile shows a message — administrators can follow the link to the document storage settings.
Affected instances
For ticket types with the inventory integration feature enabled, the affected instances tile lists the instances (e.g. servers, devices, or other monitored objects) related to the ticket:
- Add an instance with the add icon and search for it by name.
- Click an instance to open its details.
- Remove an instance with its delete icon.
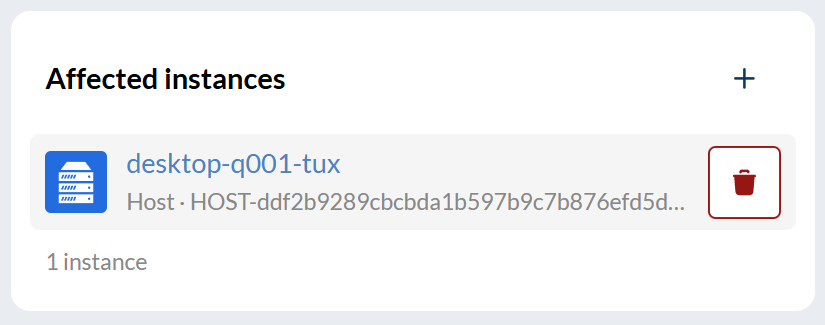
Figure: Ticket participants
Note: This tile is only shown for ticket types configured with inventory integration, and only the sections you have permission for are visible.
Adding and removing instances is recorded in the activity feed.
Participants
The participants tile lists everyone involved in the ticket. Roles are derived automatically:
| Role | Who |
|---|---|
| Assignee | The user the ticket is assigned to. |
| Contributor | Everyone who has worked on the ticket — commented, edited, logged time, etc. |
| Watcher | Users explicitly added to follow the ticket. |
- Add a watcher with the add icon by entering their email address, or picking a colleague from the suggestions.
- Join as watcher — use the link in the footer to add yourself with one click.
- Remove a watcher with the remove-watcher icon on their row. Only participants with the Watcher role can be removed this way — the assignee, reporter, creator, and contributors cannot.
- Chat in Microsoft Teams — use the Teams icon on a participant's row to open a chat with them, pre-filled with a reference to the ticket.
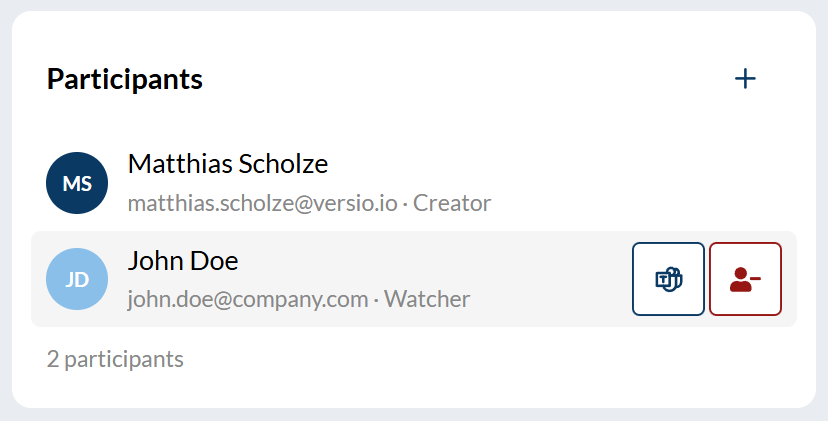
Figure: Ticket participants
Note: Added and removed watchers are recorded in the activity feed.
Permissions
Note: What you can see and do on a ticket depends on your permissions. Sections (e.g. tasks, documents, participants) and actions (e.g. editing, deleting) are hidden if the required rights are not assigned to you.